Better 3D Text in Blender with Geometry Nodes
· By Richard
Update: We have a sequel to this article where we show how to Bevel the text with Geometry Nodes! Check it out
Today I'm sharing a quick tip on how to get more control over the topology of your text meshes in Blender.
If you look at the topology of the default Blender text, it's a mess:
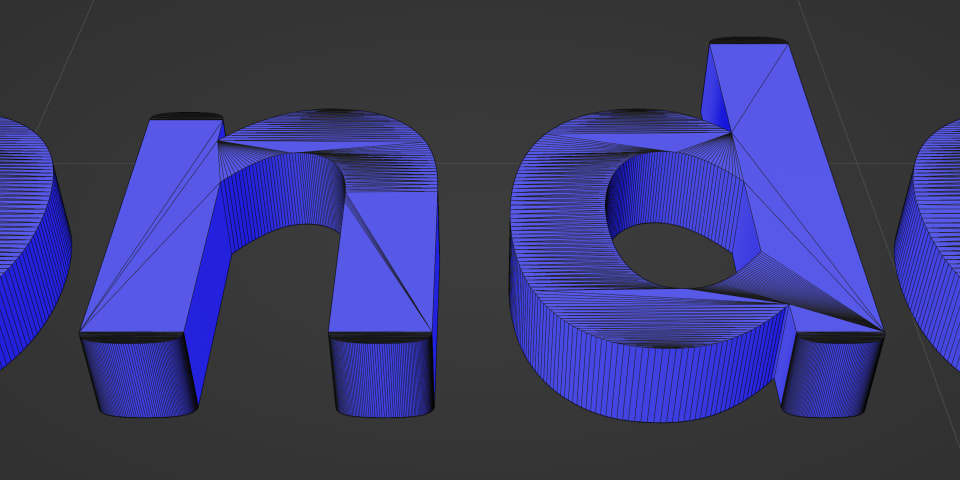
Why the mesh is a mess
What's causing this mess? The curves that make up the outside of the letters have points distributed over them.
The way Blender distributes the points corresponds with the "curvyness" of the curve. Straight parts of the letters almost have no points, curved parts have a lot. The more curved, the more points. This is a good strategy to get the smoothest result with the least number of points. But it has its downsides too.
It results in a very inconsistent topology density. And when Blender creates triangulated faces out of this, we end up with this chaotic clutter.
Geometry Nodes to the rescue
With Geometry Nodes you can also create text, and have far more control over the way it's converted to a mesh.
First of all, we can tell Blender to create Ngons instead of triangles. This makes it look a lot simpler.
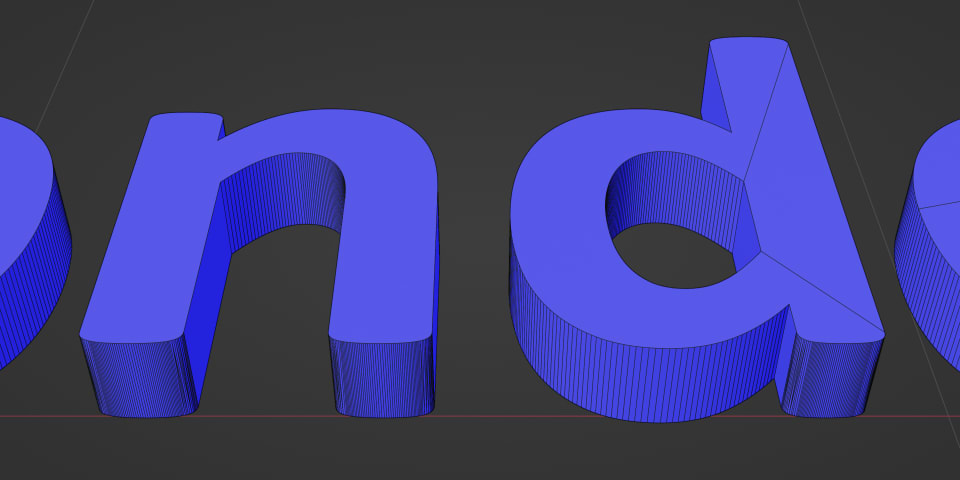
What's even better: We can control how Blender distributes the points over the text curves. If we use a Resample Curves node, we can tell Blender to sample the curve exactly consistent.
This gives us a consistent resolution. Regardless of whether the part of the letter is straight or curved.
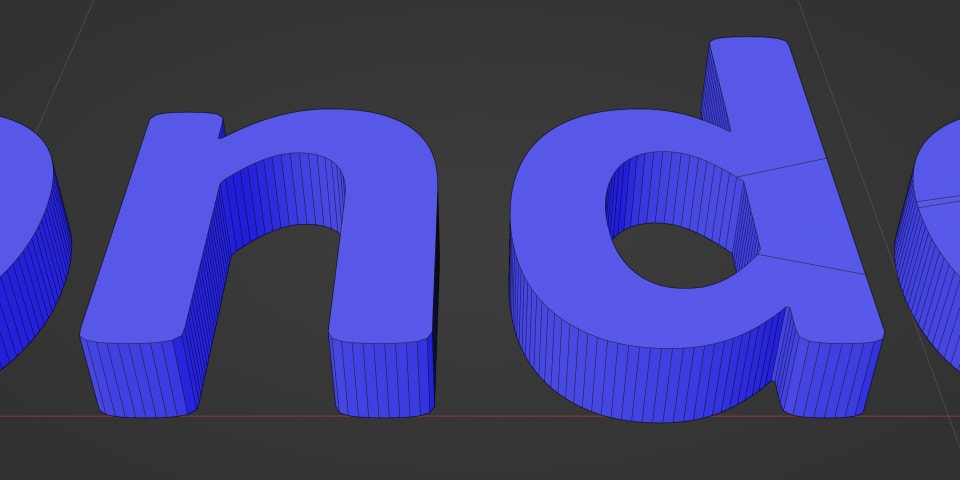
Making it 3D
We can use the new Extrude Mesh node (introduced in Blender 3.1) to turn the flat text into 3D. This moves our original faces up, so we have to join the result with the original faces. This is easy with a Join Geometry node. Then flip the original faces to make them point outward, and finally merge them togeter with a Merge by Distance node.
Check the video on how to set it all up from scratch:
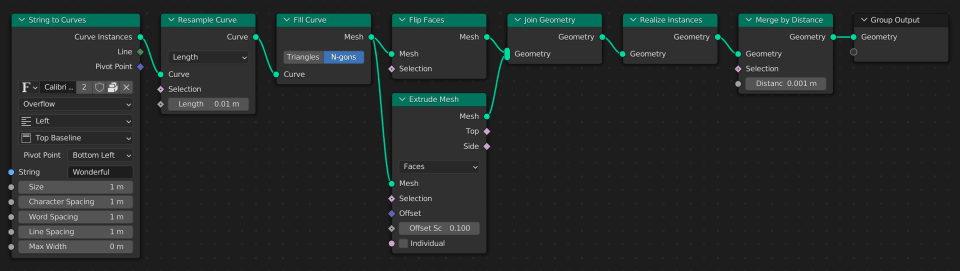
This is what our final Geometry Nodes tree looks like:
You can download the final .blend file here: geonodes-text-final.blend
To open it, make sure you are using Blender 3.1 or later, for the Extrude Mesh to work.
Happy Blending!
If you like this article and you want to go deeper and learn how to bevel the text, check out the sequel: Beveling text with Geometry Nodes