Generative 3D NFT Collections in Blender with FZRandomizer
· By Richard
Today we're taking a look at a very powerful Blender add-on: FZRandomizer.
This add-on helps you generate large collections of unique characters. (or anything that can have variations). It's very useful for NFT collections in particular.
In a previous article I covered a similar workflow, using Blender's driver system. There, we semi-automatically created a collection of Suzanne's. The purpose was to show this is possible without using any external scripts or tools.
Now I'm showing you how to go through the same workflow, using the same project, but with FZRandomizer.
As always, I've also recorded a screencast where I go through all the steps:
If you prefer reading tutorials in text form, here you go:
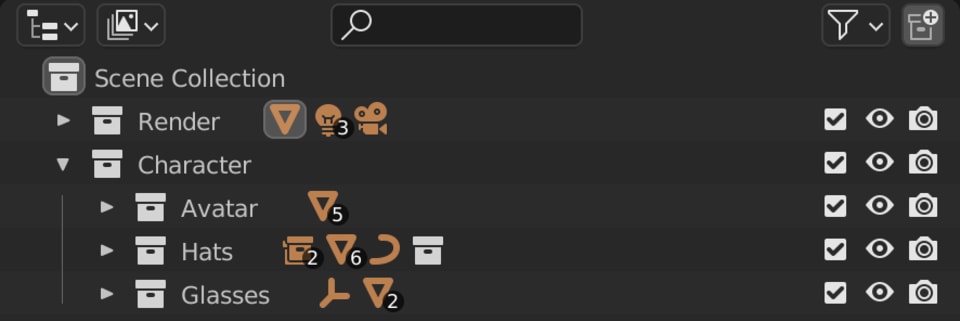
Scene Collection Hierarchy
First we organise the scene with Blender's "Scene Collections". FZRandomizer works with a certain hierarchy of collections.
We need one "root" collection that includes all the trait collections. In the video I created a new Collection called Character. The trait collections for the Avatar, Hats, and Glasses were already set up in the starting file. All we need to do is to move these into the Character collection. That's it.
Now we have the proper scene hierarchy to get started.
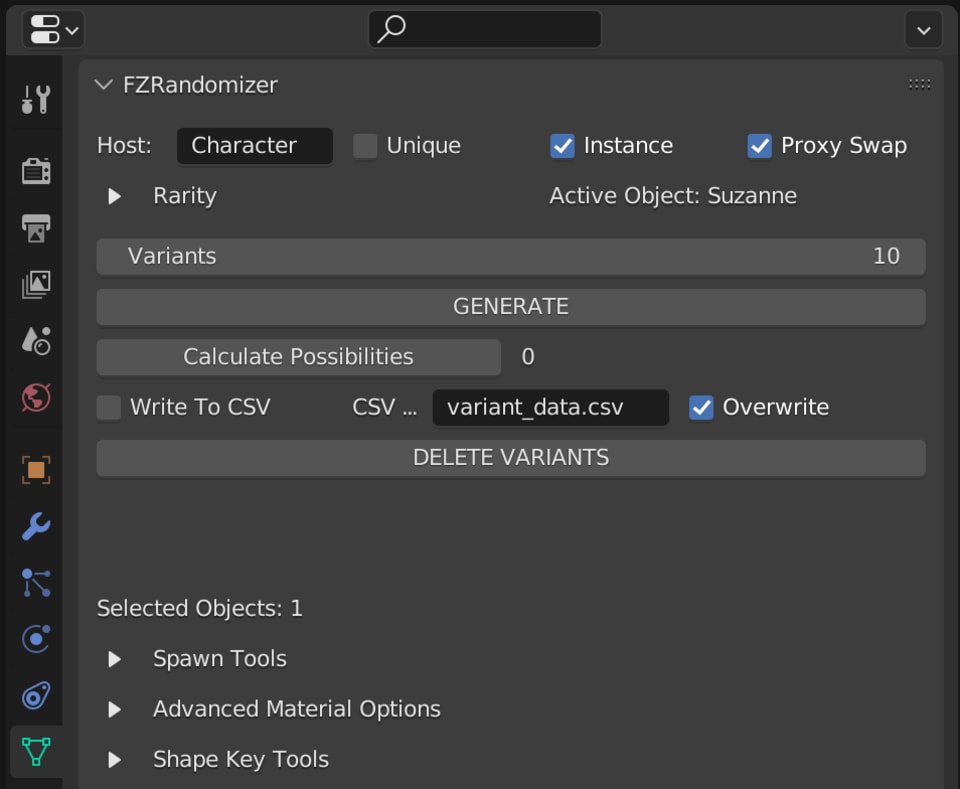
FZRandomizer Settings
To get to the FZRandomizer panel. You need to have an object selected, check the Object Data Properties tab and scroll down.
In the panel, you will have to fill in the name of your root collection. (the one we just created and named Character). By default, the name is already set to "Character" so we're good to go.
Avatar Materials
The first trait we work on is the material of our Avatar, Suzanne. In the previous tutorial where we used Drivers, we set up a simple Geometry Nodes tree. It allowed us to switch material slots on the Suzanne object using drivers.
With FZRandomizer there are a few ways to vary the materials. I'm going with the simplest way. It involves a little bit more manual work, but it's easiest to understand.
FZRandomizer varies traits by checking for objects within the different trait collections. Our trait collections are Avatar, Hats, and Glasses. So for switching our material, we look at the Avatar collection. (Because we want to switch the material of our avatar, Suzanne).
With the current setup, the Suzanne object is the only object in the Avatar collection. This way we can't vary anything.
The way we want to set it up is to create different avatar objects that each hold their own material. In this case, we have 5 materials so we'll need 5 objects.
I'm duplicating the Suzanne object 4 times. Instead of Shift+D we use Alt+D. Shift+D creates a copy of the object AND the mesh. Alt+D duplication will duplicate the object, but it will re-use the same mesh data. This is perfect because we only want to vary the material.
After using Alt+D 4 times and renaming our 5 Suzanne objects. We can assign the materials. By default, Blender assigns a material to an object's mesh data. All 5 objects share the same mesh data, so that means they would all get the same material. Instead of Mesh Data, we can switch the material slot to use Object Data instead. This is how we can vary the material the way we want.
Now, we have 5 objects in our Avatar collection. FZRandomizer can pick a random one and everything will work as expected.
Hats
The Hats collection already has a few objects in it that FZRandomizer can pick. But it only works for objects. There also is a collection in there that represents the Cap variation. FZRandomizer seems to ignore the collection completely.
An easy solution for this, is to turn the collection into an object. We add an Empty object into the Hats collection. With the Empty we use a feature called Instancing in Blender.
We can go into the Object Properties tab of the Empty, and instance an entire collection from it. Now the Empty shows up as the Cap collection.
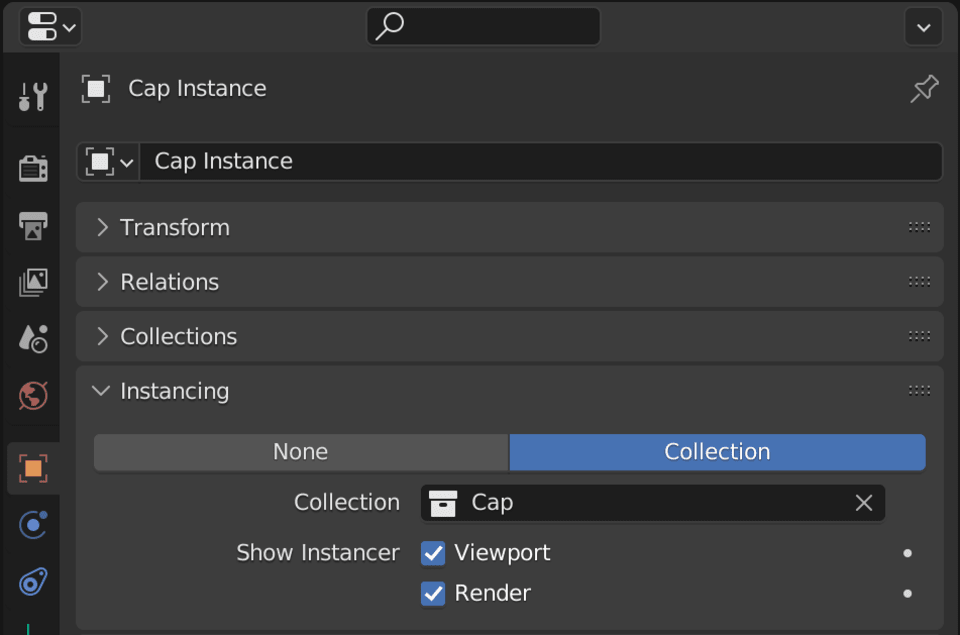
We can disable original Cap collection. Now FZRandomizer considers the Empty another Hat choice.
Another thing we did in the previous tutorial to add more variations, is to include the option "no hat". For this there is also an easy trick, simply add another empty object to the collection. Call it something like No Hat and that's it. Since an empty does not show up in the render, when the No Hat object is chosen, we show no hat.
Glasses
The final trait, Glasses, is easy. Every pair of glasses is already an object. So all we have to do is add an empty into the Glasses collection, call it No Glasses, and we're set.
When we hit the button Calculate Possibilities, we should now see the number 75. This means 75 possible variations are possible with our current setup.
(That's 5 Avatar Materials, 5 Hats, and 3 Glasses: 5 * 5 * 3 = 75)
Generating Random Variations
Now we can finally use the power of FZRandomizer and let it do the heavy lifting for us. We can hit the button GENERATE which does a few things.
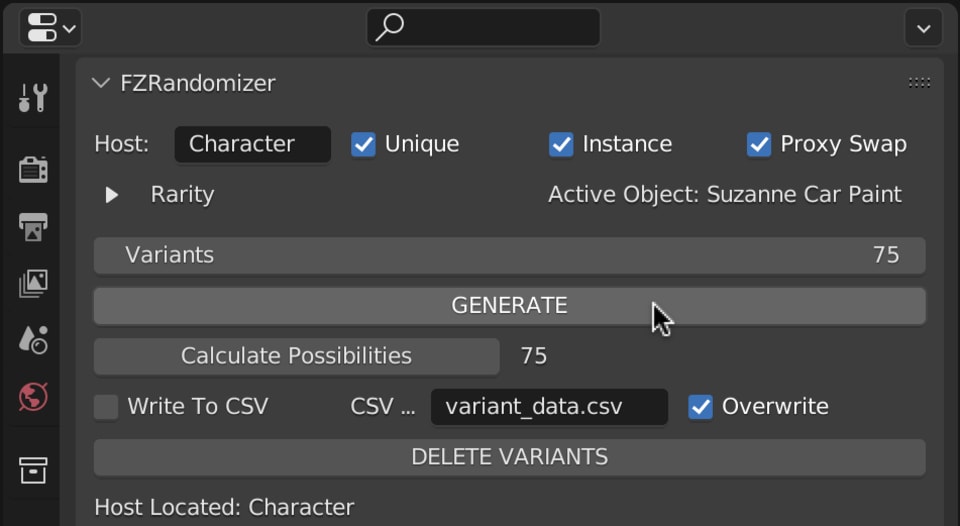
First of all, it changes our timeline frame range from 1 - 10. This is because by default the Variants number is set to 10. So we have generated 10 variations (or variants) and assigned each one to one frame on the timeline.
Second, it modifies our scene hierarchy. If we enable Proxy Swap, it will add two new Collections to our scene. One called Variants and one called SPAWNS. I recommend using Proxy Swap in general, because it is more memory efficient.
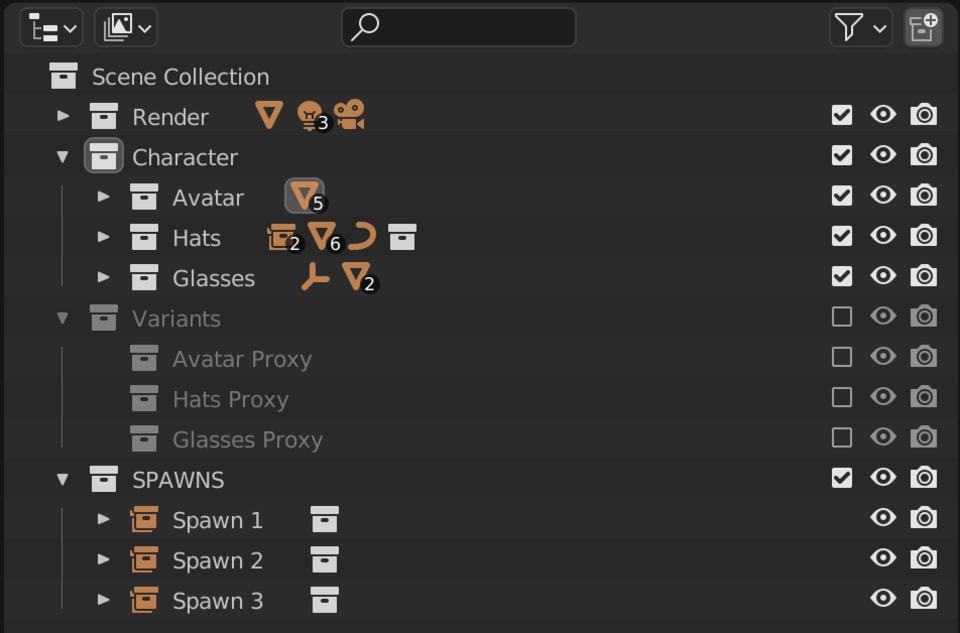
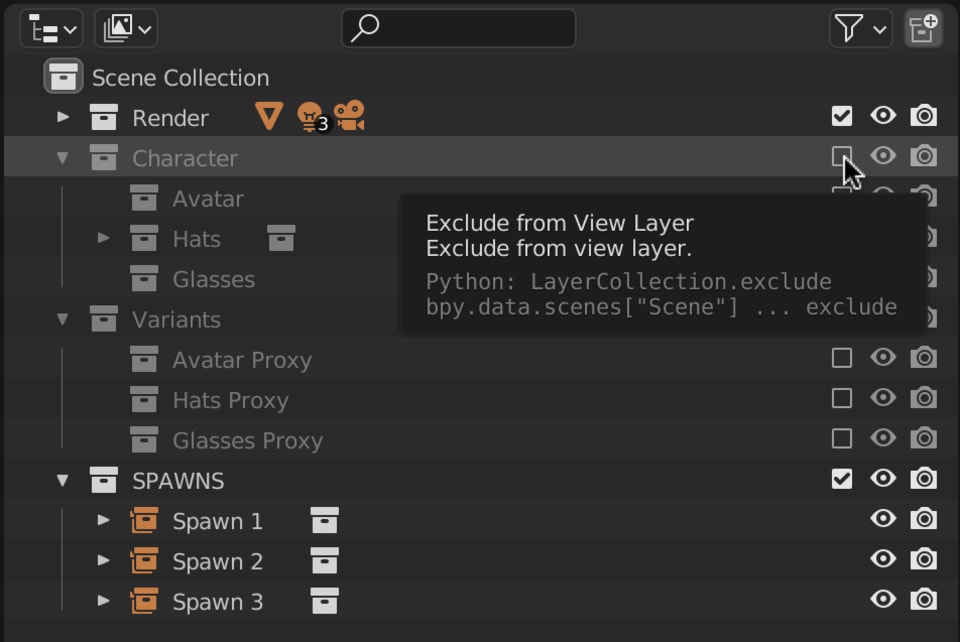
After we have pressed GENERATE, we can now turn off the collection Character. It's no longer needed because the SPAWNS collection takes care of spawning objects.
Collection Size
To set our final collection size, we have to change the default number of Variants of 10. In our case we want 75.
If we now hit GENERATE again, we will see the frame range jump to 1-75.
Each time you hit GENERATE, FZRandomizer re-enables your Character collection. So be sure to disable it after re-generating the collection to make the variants swap on a frame change.
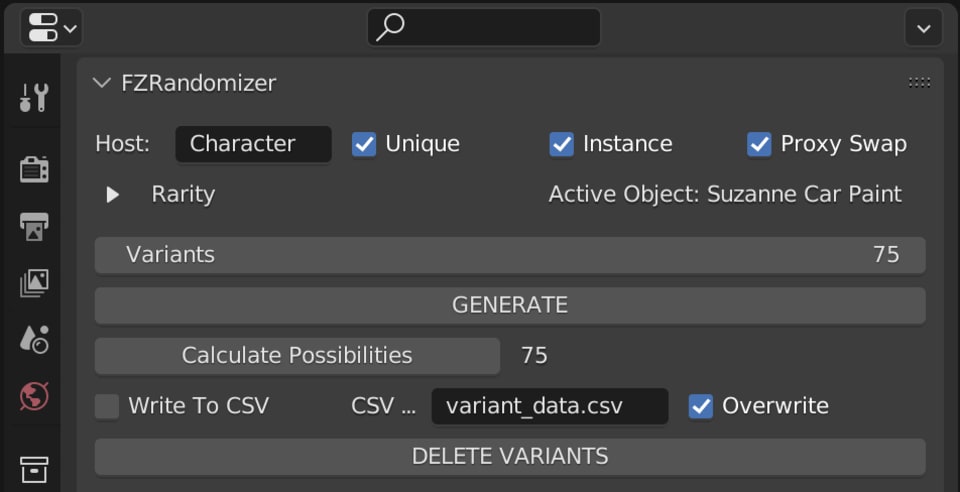
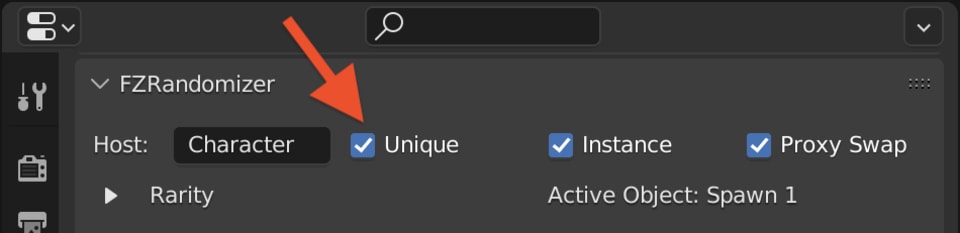
Unique Variations
Now, setting the Variants to 75 does not mean that we get 75 different variants. If that is what we're after, we have to enable the Unique checkbox as well. This will make sure every frame has a unique variant and we end up with all 75 possible variations.
A word of caution though for collection sizes in the order of 10,000 or more. You want to ensure that the number of possibilities is at least double the number of your collection. If the number of possibilities is too low, FZRandomizer has a hard time finding unique ones.
Rendering
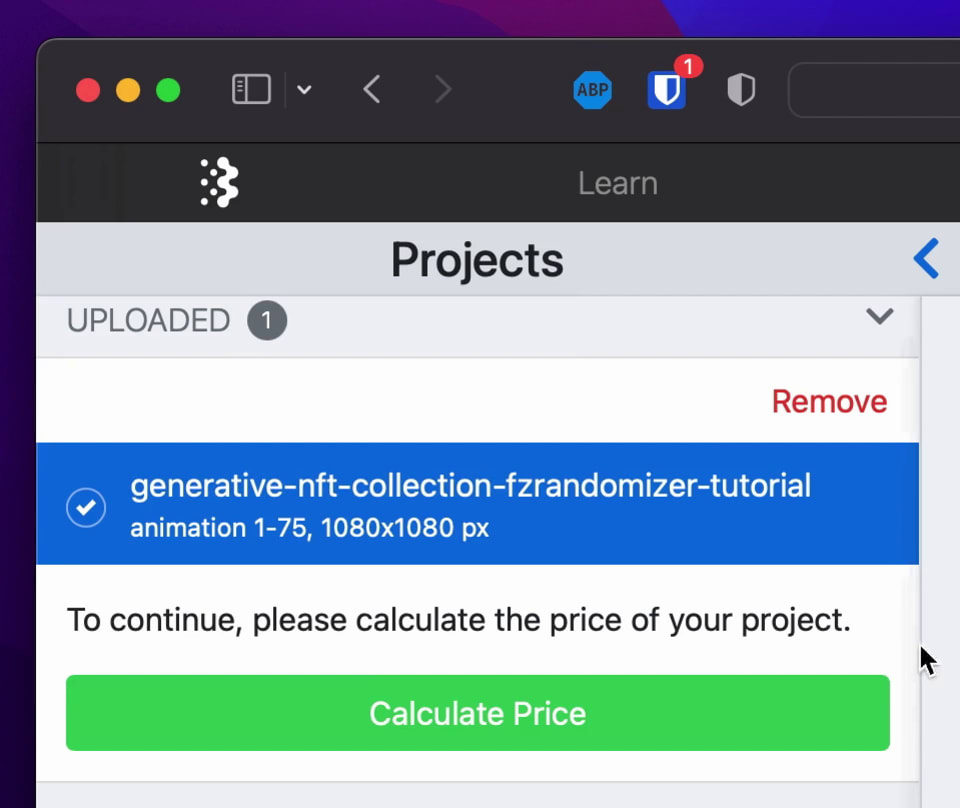
Now we have a timeline with 75 frames, and each frame has a unique variant of our Suzanne character.
The way to render them out as a bunch of images, is to render the scene as an animation. The output format should be set to an image format, like .png or .jpg. That's how easy it is.
It's a very similar setup as the previous tutorial, where we used drivers to manage the variations.
If you want to render it on Blendergrid, simply upload it and render it out as an animation like you normally would.
We don't even need to have FZRandomizer installed on our Blendergrid cluster. Because when you hit GENERATE, it generates keyframes in the background. These keyframes switch the traits on and off as needed. This way, everything gets "baked" into the .blend file and just works.
I hope this little walkthrough was helpful. Especially to those fellow artists working on their own 3D art collections!
If you think something is unclear or I did something wrong, feel free to shout at me in the comments ;)
Happy Rendering
Downloads
The Add-on: FZRandomizer
The starting .blend file: generative-nft-collection-start.blend