Path Guiding in Blender: Optimize Your Interior Renders
· By Richard
Welcome back to our series on optimizing rendering in Blender!
Today, we're exploring a feature called Path Guiding. In the current Blender version as of writing this (4.1) path guiding is turned off by default.
This choice was probably made because it's not beneficial in every 3D scene. But because it's turned off by default, a lot of users simply never touch or try it.

Why You Should Care About Path Guiding
Path guiding can help reduce noise in your renders in less time. It's useful in scenes where the light sources are "hard to find" for Cycles.
A good example of scenes with hard to find light sources is interiors where most of the light energy comes in through windows.
Demo
Check out the screencast where I walk through the Path Guiding setting and use it in an interior scene in Blender:
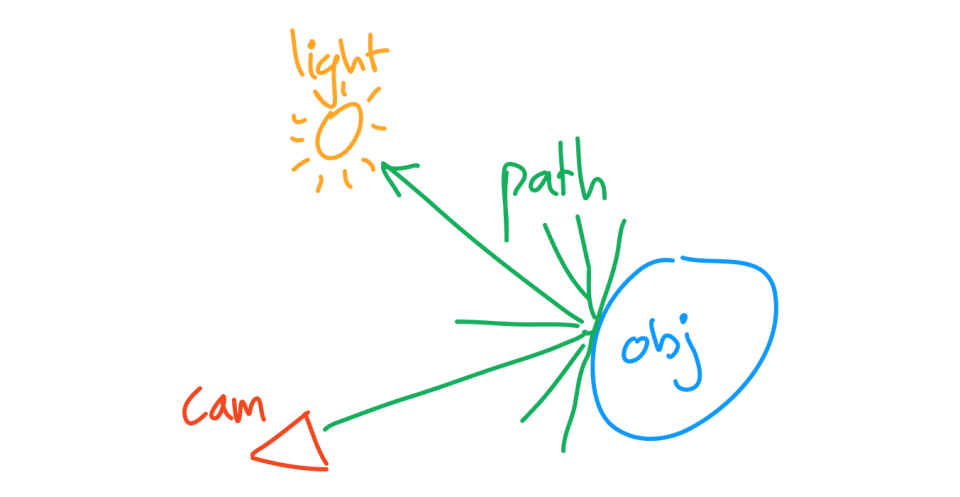
What Path Guiding Does
Let's break it down: When rendering, Cycles figures out light paths by bouncing rays around the scene. Usually, these rays scatter around randomly.
When the light sources are small, most of these random light paths will miss the light source completely. This way, the majority of samples will include very little useful information for the final pixel values (the color).
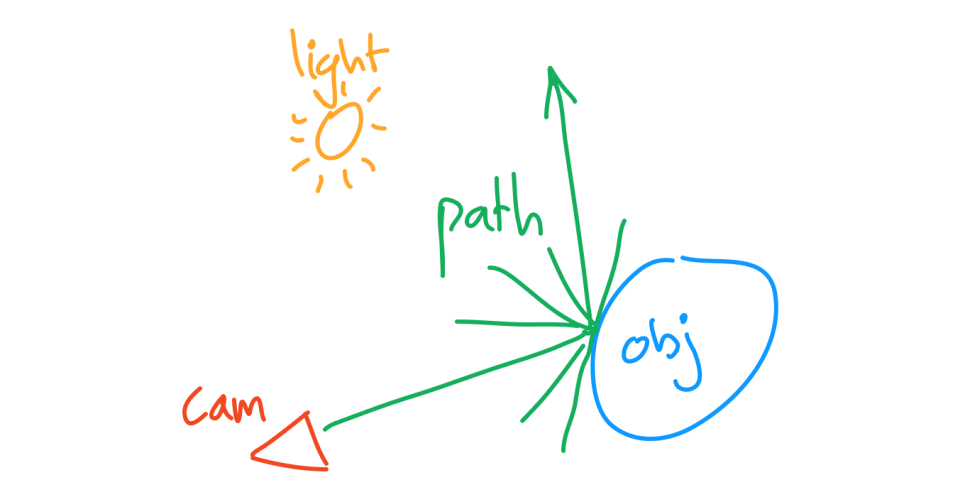
This leads to very noisy images that require a lot of Cycles samples to become clear. (sounds familiar when rendering interiors?)
With path guiding, Blender acts a bit smarter about where it points these rays, aiming them toward light sources that contribute the most to the light in the scene.
This means less wasted effort, and cleaner images, in less time.
When to use it
With this in mind, we can start to figure out when and when not to use path guiding.
If your 3D scene is completely "open", meaning fully exposed to the world background AND the world background provides a lot of light into the scene, then path guiding might not be worth it.
However, if your scene is lit by a few small light sources (point lights, small area lights, spot lights) and the world background is not adding a significant amount of light into the scene. Or if you're working with a typical interior architectural render, then it's definitely worth trying.
If you're unsure whether or not your scene is good for path guiding: Just test it. Try to turn it on, and compare render time and noise levels. It's only a single checkbox so pretty quick and easy to test the before/after and then you'll know whether it's worth using or not.
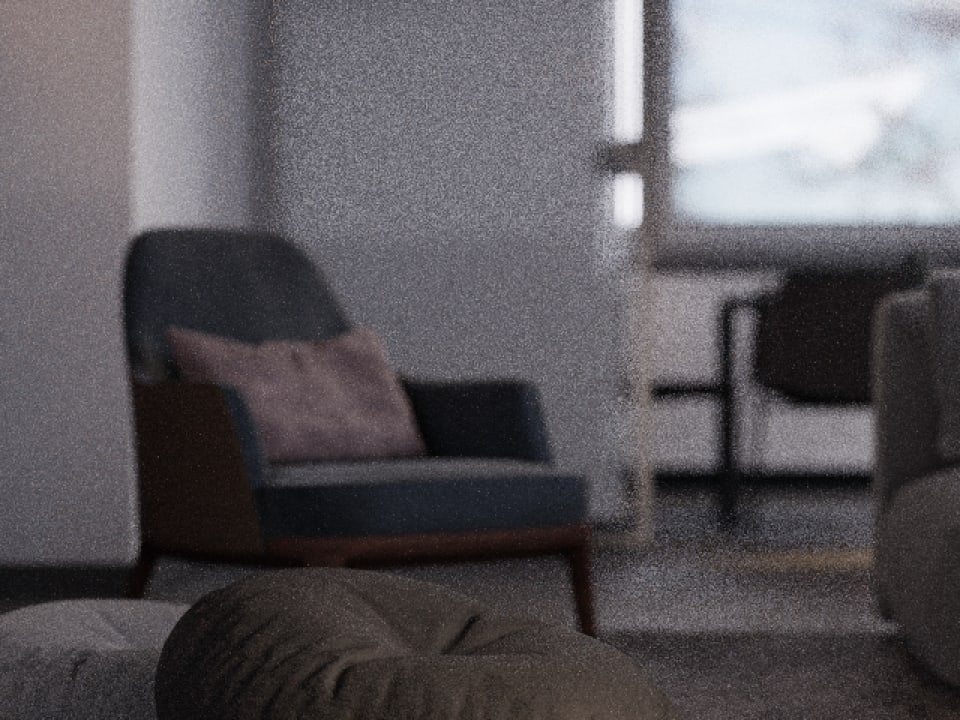
Real example: the Italian Flat
For a practical example, we used an interior scene from Blender's Demo files called the "Italian Flat" made by Flavio Della Tommasa.
Without path guiding, rendering with 384 samples took 7 minutes and was pretty
noisy. Turning on path guiding cleaned up the noise and improved the scene's clarity,
although it increased the render time to 9 minutes.
When we reduce the Cycles samples to 295, it brings the render time (with path
guiding) back down to 7 minutes. But the render is still significantly less noisy.
Making the path guiding feature a clear win in this case.

A more scientific way to look at noise
Instead of visually judging how noisy an image is, I wanted to find a way to measure or quantify noise levels of a render.
What I ended up with is rendering a certain frame at very high quality, to create something we can consider the "perfect render".
Then when you render at lower, more realistic sample counts, you can compare the two images and measure how much different they are.
When you plot this noise versus the render time, you can a nice way to compare the render time with and without Path Guiding turned on:
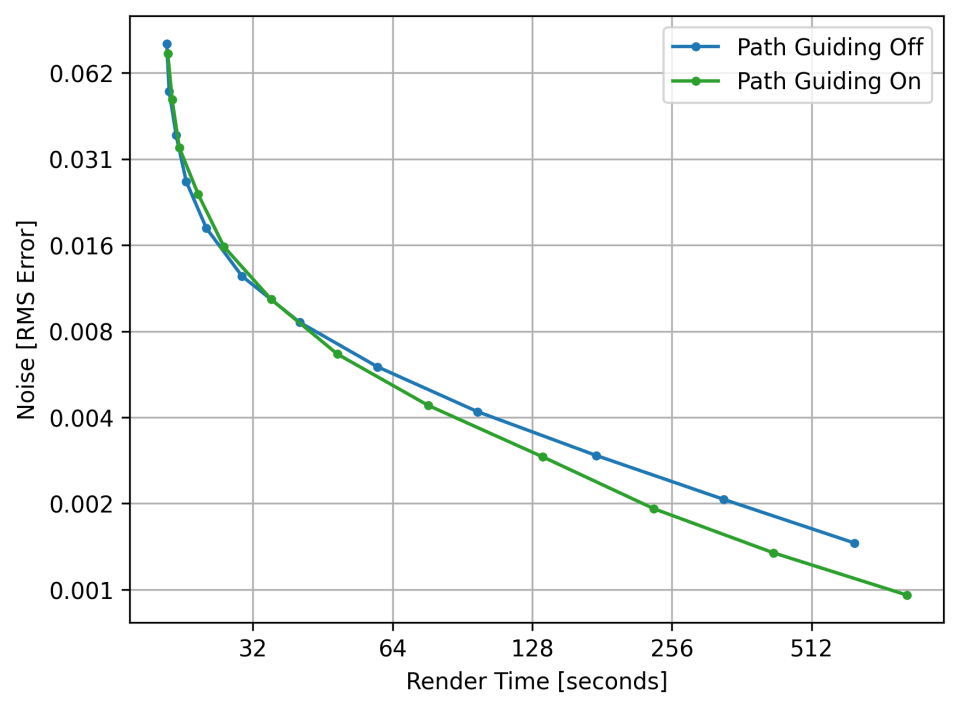
This doesn't directly measure noise, but it does measure the difference (or error) between our render and the perfect render (which is the goal). So it kind of measures the accuracy in a way.
But the error starts of very high and goes down over time, so it behaves the same as noise. And the closer we get to a "perfect render" the better. If we can get closer to a "perfect render" in less time, then we're onto something.
The way I compare the image with the "final goal" image is by taking all pixels, all color channels (r,g,b) and subtracting them from each other. Then I take the square of each of these value to make everything positive, which is a very common thing to do when measuring things like errors.
Now we take the average squared error, take the square root of this, to negate the effect of the square we did earlier, and use that value as our "noise" or "error" level.
To make this work perfectly, we would have to render our "perfect render" with infinite
samples. I didn't have time for that so I rendered it with a little over 1 million
samples (2^20) which is almost the same as infinite in this scene.
So now with this perfect render, we're able to compare it with any other render of the same frame (and same resolution) to quantify the noise level. This is very useful because now we can see how much noise we get when flipping Path Tracing on and off.
Then we can compare render time at a certain noise level. Let's take a noise level of
0.002 for example. We can find the render time to get to this noise level for both
with and without Path Guiding by simply interpolating between the two closest
surrounding values we measured.
When we do that we get something like this:
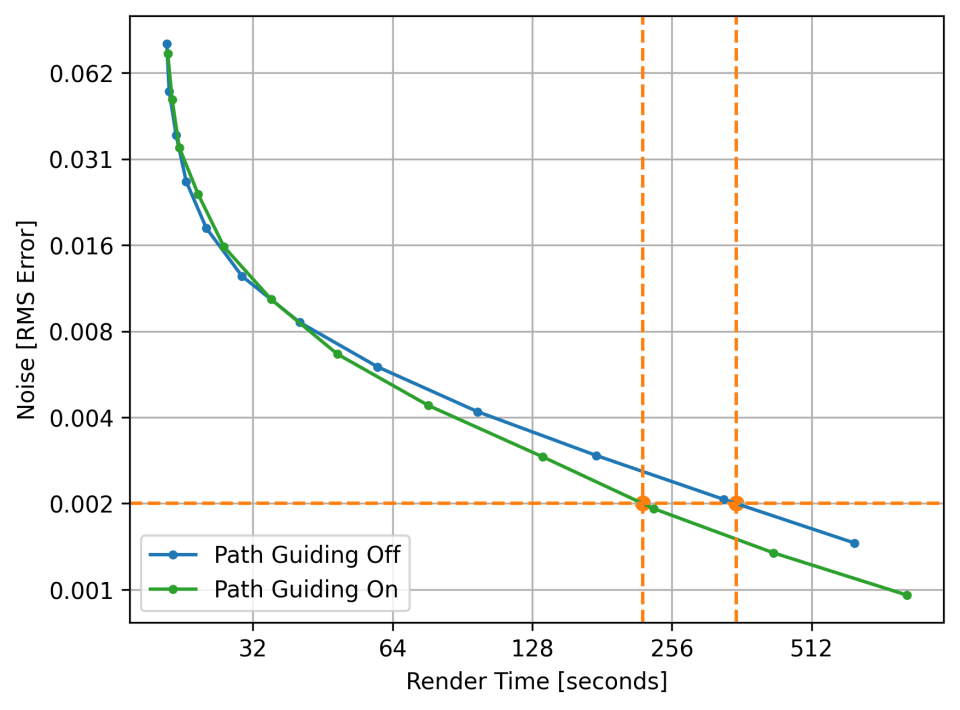
After interpolating, we find that it would take 352 seconds to reach a noise level of
0.002 when we don't use Path Guiding. But when we turn Path Guiding on, it only takes
221 seconds.
That's 37% less render time thanks to Path Guiding!
Another interesting thing we can see in the graph is that for shorter render times, Path Guiding probably didn't get enough training to start working properly, and the extra time it takes to train caused us to reach higher levels of noise for the same render time compared to not using Path Guiding.
But when we give Path Guiding enough training, the extra render efficiency outweighs the extra time we need to train it 👍
Tweaking Path Guiding
Path guiding first needs to "learn" about the light distribution in your scene in order to work. But the cool thing is: You don't need to worry about this, because it happens during rendering :)
First we let Cycles take random samples in the scene, the way it normally works without path guiding. But while doing this exploratory rendering, the path guiding feature keeps track of the light sources that contribute to the scene.
When training time is over, it will use this information during the rest of the render, and hopefully be able to sample more efficiently.
You can control the time it learns vs the time it uses the information it has by
adjusting the training samples setting. A good range for training samples is typically
between 128 and 256, depending on how many total samples you're working with.
If you're only rendering 300 samples I would not set this to 256, because that's 85%
of samples spent learning. The total render speed will take big hit from this.
But if you're rendering with 2000 samples, 256 is only 13% of the total samples. In
this case it's probably worth spending some more time learning the light distribution,
because it will make the rest of the 2000 samples more efficient.
GPU Rendering Note
At the time of writing this, in Blender 4.1, path guiding is only possible with CPU rendering. So for local GPU rendering this article might be less useful.
I hope the feature will become available for GPU rendering soon.
If you're rendering with Blendergrid, this is a very relevant feature though because we do the majority of rendering on large CPU servers.
Wrap Up
Path guiding is a powerful feature for optimizing your rendering, especially in interior scenes. If you're unsure whether it's useful in your scene, it's worth just turning it on and comparing the render time and noise levels before and after.
Stay tuned for more quick tips on rendering your Blender projects faster!
Got questions or ideas for what we should cover next? Drop a comment below. Happy rendering, and catch you in the next one!
Looking to speed up your Blender renders even more? Upload your .blend file here. We can handle the heavy lifting for complex scenes or big animations, helping you get professional results quickly.