Render Generative 3D NFT Collections in Blender
· By Richard
Using 3D renders is becoming very popular in NFT land. Many 3D artists are selling their renders as NFTs.
If you've not been hiding under a rock for the past year, you must have heard about the concept NFT collections. These are, as the name suggests, collections of NFTs. (no sh*t Sherlock)
Sometimes as many as 10,000 different pieces of artwork can make up a single collection.
What if you want to use your 3D model/scene and generate a collection of 3D renders from it? That's what we'll talk about in this article. And we'll do it in a generative / automated way so you don't have to create each combination manually.
Let's say you have a nice 3D model (avatar) in Blender. To make unique renders, you need some ways to create variations of your avatar. You could vary the materials, or add various accessories to it to make unique versions.
TLDR; Watch the video
I've recorded a full walkthrough of setting up the scene to spit out our NFT collection:
If things get a bit complicated and confusing in the video, maybe this article helps you get a better understanding of what we're doing.
Drivers instead of scripting
We're not going to use any Python scripting, even though it's a powerful Blender feature, it's not required to generate our collection.
What we're going to use instead is: Drivers.
Drivers are a powerful concept in Blender. They are kind of like keyframes, but more flexible. As the name suggest they can drive values and settings. The value of a driver is set by a driver expression, which is like a formula that can use other settings and variables.
To generate our NFT collection, we will only use the frame as a variable in our driver expressions.
Starting Point
For the sake of not wasting too much time, I have already prepared a starting .blend file.
Download the starting .blend file
I assume you have an existing 3D model you want to create a collection with, or have an idea of creating something. You can either download our starting file, or follow along with your own scene.
To keep things simple, we will use Suzanne as the base model or "avatar".
For accessories we will use various hats/caps and sunglasses that I grabbed off BlendSwap.
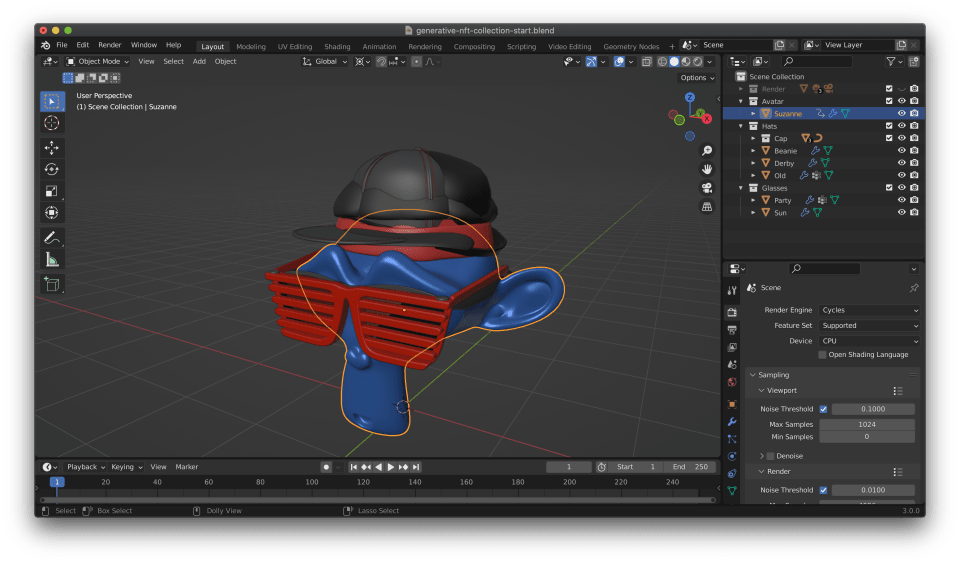
We will also create variations by giving our avatar Suzanne different materials. To save time I bought some nice procedural shaders from Ryan King on the BlenderMarket.
How large will our collection be?
The number of different combinations you can make depends on two things:
- How many different types of variation you have
- How many choices per type
In this example we have 3 types of variation:
- Materials
- Hats
- Glasses
The number of choices varies per type:
- 5 choices of materials
- 5 choices of hats
- 3 choices of glasses
Note that we only have 4 types of hats and 2 types of glasses. But because "no hat" and "no glasses" are also a valid choices, we actually have 5 choices of hats, and 3 choices of glasses.
Does that mean we generate a collection of 5 + 5 + 3 = 13 different combinations? Nope! Because each choice of material can use all choices of hat, etc. we can make 5 * 5 * 3 = 75 different combinations! Powerful.
The most common size of NFT collection is 10,000. How can you get 10,000 unique combinations? One way to do it is to have 5 different types of variation, and 10 different choices per type. This gives you 10 * 10 * 10 * 10 * 10 = 10,000.
(If you want to increase the "rarity" of certain traits, increase the numbers even more, and make certain traits less common.)
In this example, as a proof of concept, we'll stick with a collection of 75. But it's all automated so you can use these tricks to generate huge collections with ease.
How to automatically generate the variations?
We are going to use two tricks to automate the generation of different variations:
- Enabling / disabling accessory objects
- Changing material slots
Whether an object is enabled or disabled is set in Blender's Outliner.
And guess what? Drivers can control this :)
Which material slot an object uses can not be controlled by drivers directly. But we can work around this using Geometry Nodes. (Don't worry, we only need 3 nodes in our setup, including input and output)
Geometry Nodes to switch materials
There is no direct way to switch the material of an object with Drivers. But we can create a very simple Geometry Nodes setup that allows us to do it. Geometry Nodes are applied to an object as a Modifier.
First, we need to add a bunch of different materials to our avatar object, using the material slots.
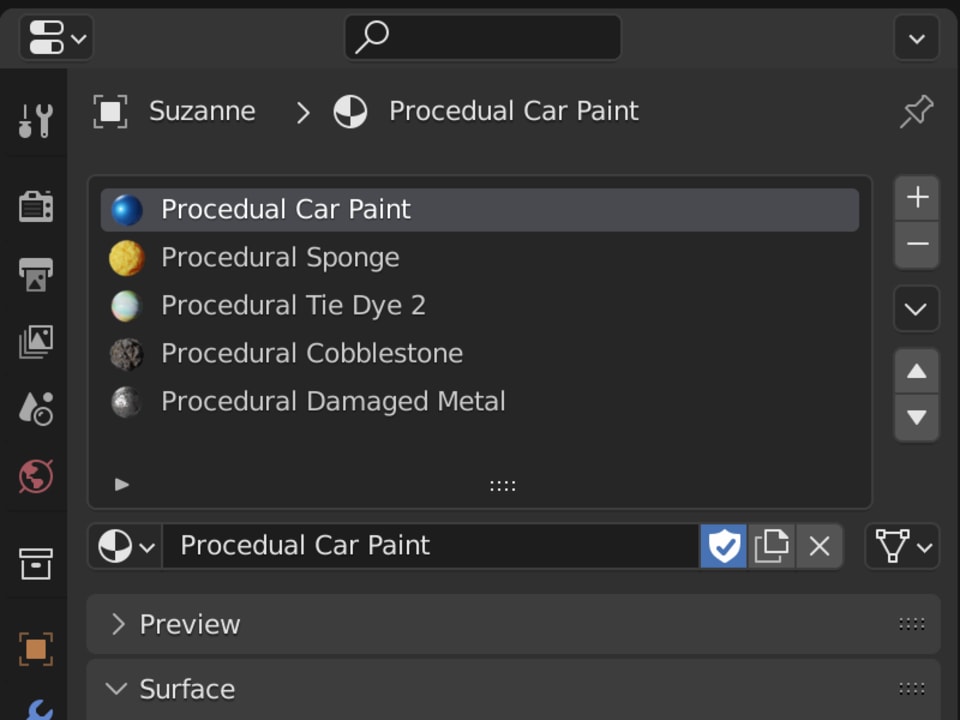
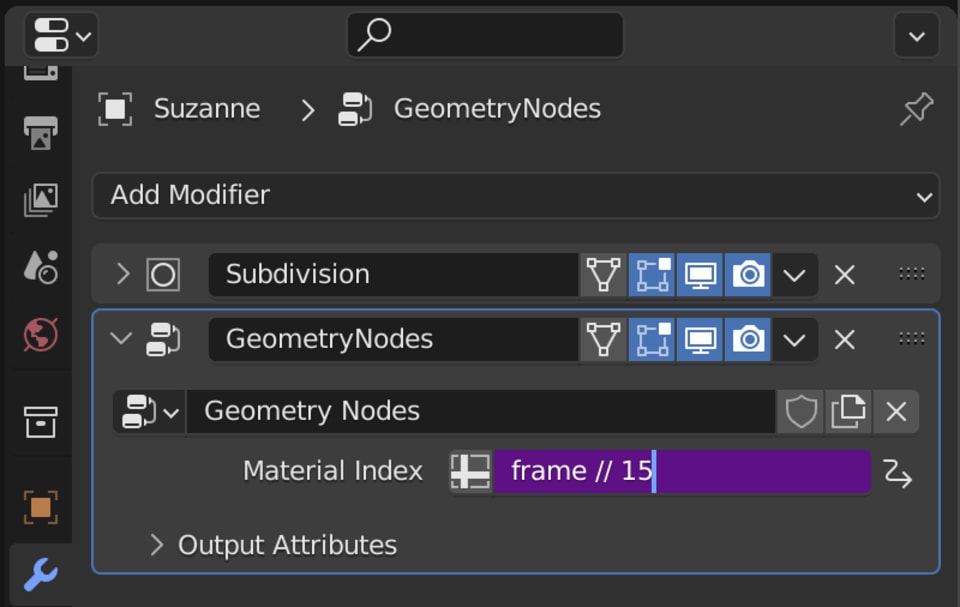
To switch between the different material slots, we add a new Geometry Nodes setup to our avatar Suzanne. Use a Set Material Index node between the Input and Output nodes, that's all. For easy access, we expose the actual material slot index value to the modifier.
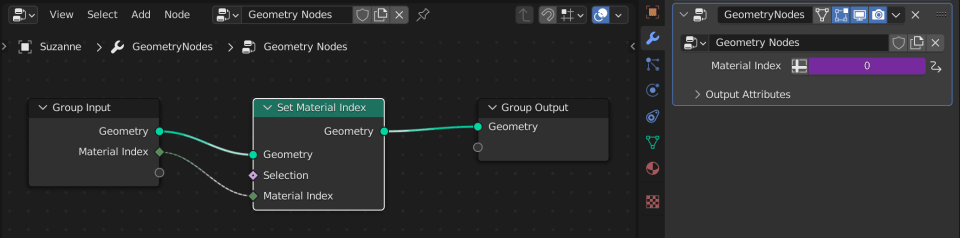
Now we can set the material slot index in the modifier settings, and we can add a driver to this setting.
Using the frame range
We want to generate a different variation, using drivers, based on the frame number.
In this example we have 75 different variations, so we need a frame range of 75 frames. Instead of starting at 1 and ending at 75 for 75 frames, we will start at frame 0 and end at 74. This will make the math a bit more straightforward.
Driving the material index
It doesn't matter which of the different categories you start with. Let's start with the materials.
Over the course of our 75 frames, we want to use every material. We have 5 materials, 75 / 5 = 15, so every material will last 15 frames. Like this:
| Material Index | Frame Range |
|---|---|
0 |
0 - 14 |
1 |
15 - 29 |
2 |
30 - 44 |
3 |
45 - 59 |
4 |
60 - 74 |
The way we can do this with drivers, is by using the frame variable that we get for free. A quick way to use the frame as a driver in Blender is by typing in #frame into a field (if it supports drivers).
If we use the frame like this, material 0 will be used on frame 0. Material 1 on frame 1, etc.
Instead, we want a material to last for 15 frames. So we have to "slow down" the value. The way to do this is by dividing the frame by 15: frame / 15.
The result of this is a floating point value. Blender automatically converts it into an integer, because the material index is an integer.
If you want to convert the value to an integer yourself, you can use the double slash to divide: frame // 15. For example, on frame 14, frame / 15 = 0.9333 but frame // 15 = 0. Getting rid of everything after the floating point.
That's it, now over the course of our entire frame range, we loop over all 5 materials we have.
Driving the visibility of the hats
For every material (which lasts 15 frames) we want to loop over all hats we have. We have a total of 4 hats, but remember: no hat is also a valid choice. So we have 5 choices of hats. Over the course of 15 frames, we want to loop over all 5 hat choices, and then keep repeating that pattern.
This gives us 15 / 5 = 3 so every hat choice has to last 3 frames.
Driving the visibility of an object is different than driving the materials. With the materials, we were driving a single value between 0 - 4. Now, we drive many values, and they only have two states: enabled/disabled (boolean).
The way I would like to make this work is as follows:
| Object | Enabled on frames |
|---|---|
| No Hat | 0 - 2 |
| Cap | 3 - 5 |
| Beanie | 6 - 8 |
| Derby Hat | 9 - 11 |
| Old Hat | 12 - 14 |
..and repeat this for every material (every 15 frames).
In other words, on frames 0 - 2, everything should be disabled. On frames 3 - 5, the cap should be enabled, and everything else disabled.
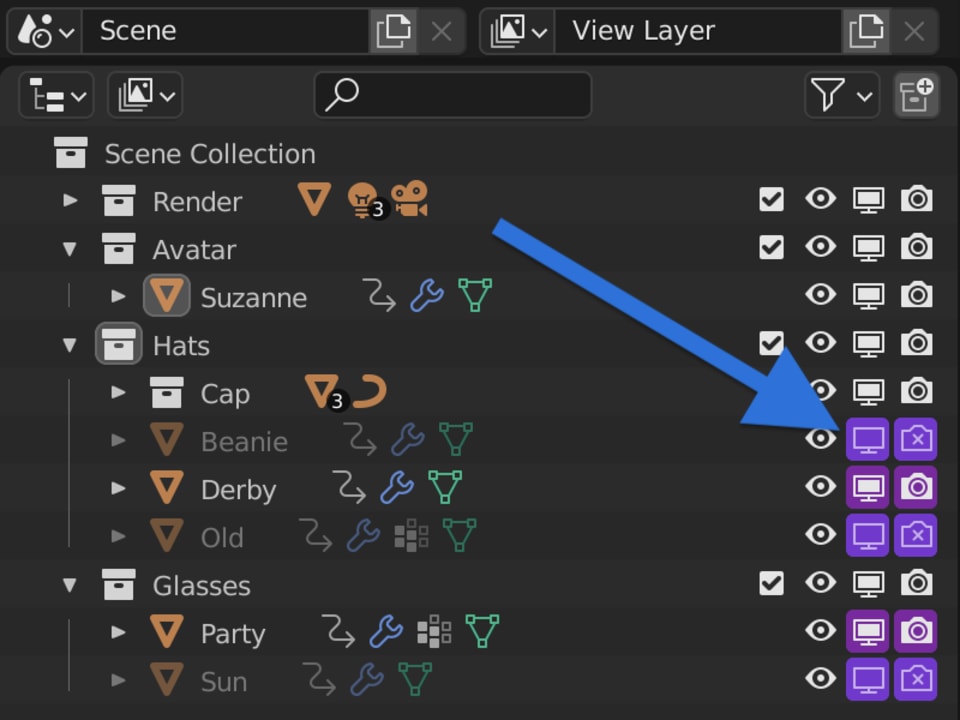
Where do we add the drivers? For the end result, the render, we add them to the render toggle of the object. (Right click, Add Driver). But to be able to see what's going on in our viewport, we also add the same driver to the viewport toggle.
By default, the viewport toggle is not visible in Blender, so you have to enable it:

Finally, our cap is not a single object but a collection of objects. Unfortunately, it's not possible to add drivers to the render toggle and viewport toggle of collections. So we have to add them to each object in the collection separately.
The way I explore the creation of the final driver expression can be seen in the video. Here, I will show you the final expression and explain a bit about how it's made up. The final expression for the cap objects is this:
(frame // 3 - 1) % 5
We work with the frame variable again. This time we divide by 3, because we want to have every hat last for 3 frames. We use the double slash divide to convert the result of that into an integer.
Then we subtract 1 from it, to offset or delay the visibility of the cap. Because we don't want to show the cap immediately. First we want to have no hat at all, then show the hat.
Finally, we take the modulo of our result using the % sign. We use 5 because we have 5 choices of hats (including "no hat"). This makes our value loop between 0 - 4.
We add this driver expression to the viewport toggle and render toggle of all objects in the Cap collection. Once you add the driver to one value, you can copy/paste the driver to the rest.

The next hat is our Beanie. We use the same expression, but with an offset (or delay) of 2 instead of 1:
(frame // 3 - 2) % 5
We apply this as a driver to the viewport and render toggles of the Beanie object.
And we continue the pattern, increasing the offset for every next hat:
| Object | Driver Expression |
|---|---|
| Cap | (frame // 3 - 1) % 5 |
| Beanie | (frame // 3 - 2) % 5 |
| Derby Hat | (frame // 3 - 3) % 5 |
| Old Hat | (frame // 3 - 4) % 5 |
Now our hats change every 3 frames, and every 15 frames we cycle through every choice of hat.
Driving the visibility of the glasses
Our final type of variation is the choice of glasses. We have three choices here (no glasses, party glasses, sunglasses). (That's why every hat lasts for 3 frames.)
So it's quite simple: Frame 0 should show no glasses, frame 1 party glasses, frame 2 sunglasses, frame 3 no glasses again, etc.
The driver expression for the viewport and render toggles of the party glasses is:
(frame - 1) % 3
The - 1 again because we start with no glasses, the party glasses is our second option, so it has an offset of 1. The modulo % 3 because we have 3 options of glasses and this makes it loop over the entire frame range.
We don't have to divide the frame by anything, because we want the glasses to change every single frame.
The expression for the sunglasses would then be:
(frame - 2) % 3
Increasing the offset to 2, that's it.
Rendering
We did it! If we now play back our 75 frames, everything will automatically switch. Every frame has a unique combination of material/hat/glasses.
We can now render out the animation to a PNG sequence and end up with 75 unique PNGs of Suzanne. A great source for an NFT collection.
Here is a download of the final .blend file in case you're curious:
Download the final .blend file
Also, this type of .blend file is render farm friendly. So you can upload it to Blendergrid and render it on our farm.
If you have any questions or feedback, please leave a comment!
Happy rendering :)
Credits
Many thanks to all the Blenderheads that created these great Blendswap models:
Beanie and Glasses
Derby Hat
Cap
Old Hat
Thanks to Ryan King and the Blender Market for the procedural shaders:
Blender Procedural Material Pack #4
And thanks to the Blender Studio for the party glasses we stole off of Jay's head (from Sprite Fright):
Jay's Party Glasses