Cycles noise is now blue, and it looks better
· By Richard
Corporate needs you to find the difference between
this picture, and this picture:


They are the same picture. (same sample count, same render time)
But the left one uses "white noise", and the right one uses "blue noise".
Blue noise looks a lot smoother :)
But what the heck is blue noise? That's what we're going to find out in this article.
Blue noise sampling
Blender 4.4 now comes with a new sampling pattern for Cycles which uses blue noise instead of white noise.
The improvement is most noticable on very low sample renders. As you increase the Cycles samples, the difference will be less noticeable.
If you're using Blender 4.4, you're probably already rendering with blue noise, because it's enabled by default. You can find it under the Render tab in Sampling > Advanced:
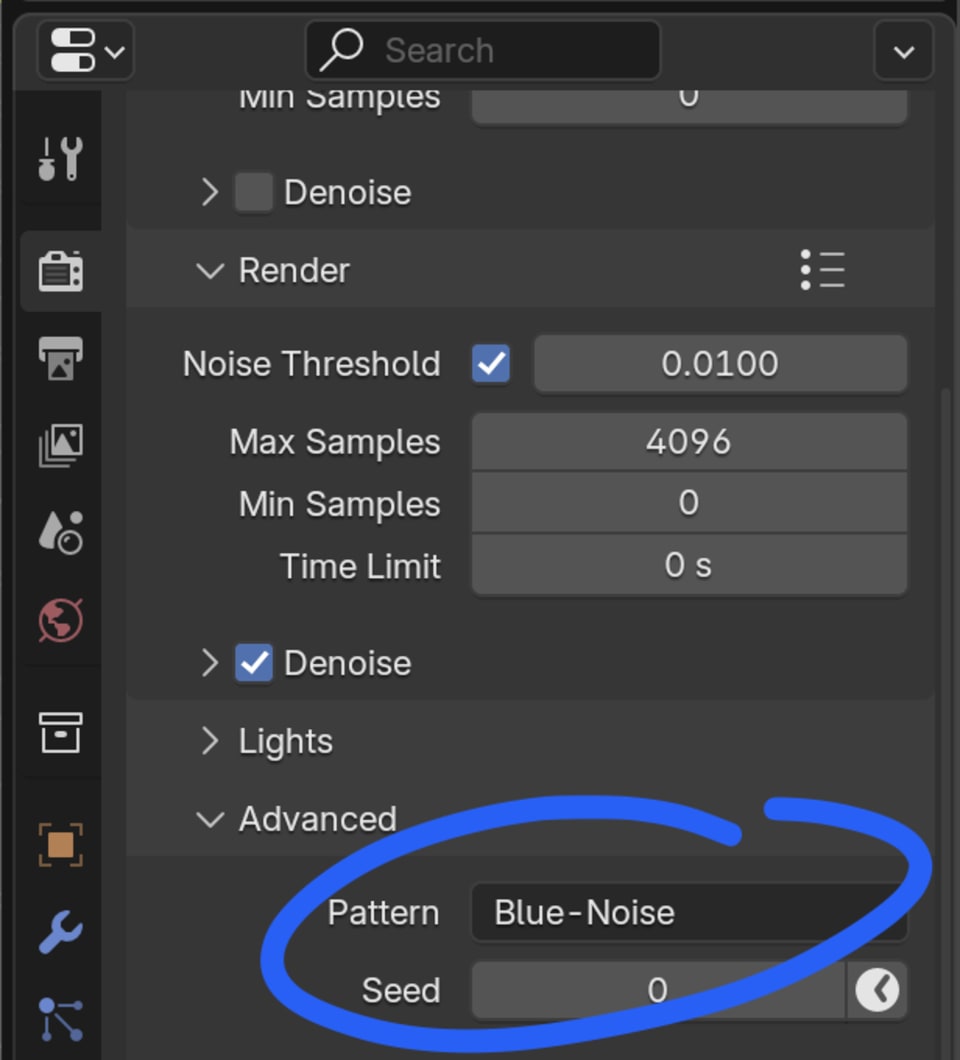
By default it's set to "Automatic", which enables the blue noise and does something slighly more optimal for viewport previews. You can also manually set it to "Blue-Noise" or "Classic". Classic is what previous versions of Blender used.
In Blender 4.4, it's anabled by default. But, if you open an older .blend file in 4.4, it's probably still set to "Classic" so you might want to set it to Automatic or Blue-Noise in that case to get the benefits of blue noise :)
I thought blue noise was an interesting topic to explore, and beyond rendering it's also useful in other 3D/CGI areas where you need random patterns. So let's look at what blue noise is, how it's different from white noise, and how we can create it.
Why randomness?
Why do we need randomness in Cycles rendering the first place??
We need to go back to first principles, what is the goal of rendering? To get a nice looking image.
What is a nice looking image? A bunch of pixels. Rendering is calculating the color of each pixel.
The (oversimplified) way Cycles calculates the colors of a pixel is: 1. Take a bunch of Samples for the pixel 2. The average of all samples is the color
A sample is taken by shooting a virtual light ray into the scene (from the camera through the pixel we are working on). The ray may bounce agains objects or light sources and reflect / refract / get absorbed. So we're tracing this path of rays through the scene. After doing this, we get a certain light color and brightness.
Doing this only once per pixel would lead to a very noisy image. That's what happens when you set the Max Samples in Cycles to 1.
So we have to take multiple samples per pixel. We don't necessarily have to shoot them out from the exact center of the pixel. If you zoom into a pixel, it's just a little square. So inside that square, we can take samples in slightly different directions by picking a different location on the square.
There are a lot of different ways we can pick these spots.
One way would be using a regular square grid distribution:

Although the points are nice and evenly spaced, this pattern would lead to aliasing issues and artefacts.
In order to reduce aliasing, we need more randomness.
So another approach is a fully random distribution. If we imagine the pixel as a square
of size 1.0, we just pick a random value between 0.0 and 1.0 for both the x
and y, and use that as the coordinates. If you do this, you get vanilla "white noise":

The randomness is good, but we get a lot of points clustered together and a lot of empty spots on our pixel where we don't take any samples.
Best of both worlds: Blue noise
A combination of both, random but also evenly distributed, would be nice.
Blue noise is an example of this: Randomly selected points, but picked such that the amount of clustering is minimized:

When Cycles uses a blue noise pattern to pick samples and shoot rays into the scene, the resulting render looks much nicer:


How do you create blue noise?
There are different algorithms for generating blue noise samples in 2D. But the most intuitive one in my opinion is "Mitchell's Best Candidate Algorithm". Here's an example of how it works:
Start with a single random point (same as fully random white noise)
To come up with the next point, we create two random "candidate" points, but only keep the "best" one. The best one is simply the one that's furthest away from any existing points.
To get the 3rd point, it's very similar. But instead of two candidates, we create three. The candidates are all generated fully randomly, the same as white noise. But we get to pick the best one and discard the rest.
Repeat this process until you have enough points
You can tweak the algorithm and give it more candidates by multiplying the n-th point
you're working on by a constant. So if that constant is 2, you create 2 * 2 = 4
candidates to pick the 2nd point, 3 * 2 = 6 candidates to pick the 3rd point, and so
on.
Geonodes
I've created the algorithm in Geometry Nodes to be able to play with it.
Here's a visualization of the algorithm:
The blue points are the ones we have created. The dark glassy points are the candidates, and the green one is the best candidate we pick. The rest are discarded, and the green point joins the blue ones.
If you've done random point distributions in Geonodes you might be aware of the "Poisson Disc" pattern. This is actually very similar to blue noise, but the parameters are a bit different.

The custom blue noise allows you to set a specific amount of points, and you will be sure to get exactly that amount.
The Poisson Disc pattern uses density which is less precice in the number of points you end up with:

Another difference of the custom blue noise setup is that it generalises to 3 dimensions as well which could be useful. The Poisson Disc (as the name suggests) is a disc which only works in 2D.
The only downside of the custom Geonodes setup to make the blue noise is that it's not very efficient. If you need more than a couple thousand points, it starts to get a bit slow.
Hope you learned something new about Cycles and noise patterns :)
If there is interest, I might do a deeper dive into how I created the Gemoetry Nodes setup.
Happy rendering!